As the years go by, unpainted fences are prone to damage due to the weather. This could lead to the fences rotting and the need for mold coverage. Therefore, fences need protection and painting is the best way to offer it.
This is so, because of what a good quality paint does. It forms a barrier between the wet weather and the wood. This thus results in the protection of the wood from rot and mold formation.
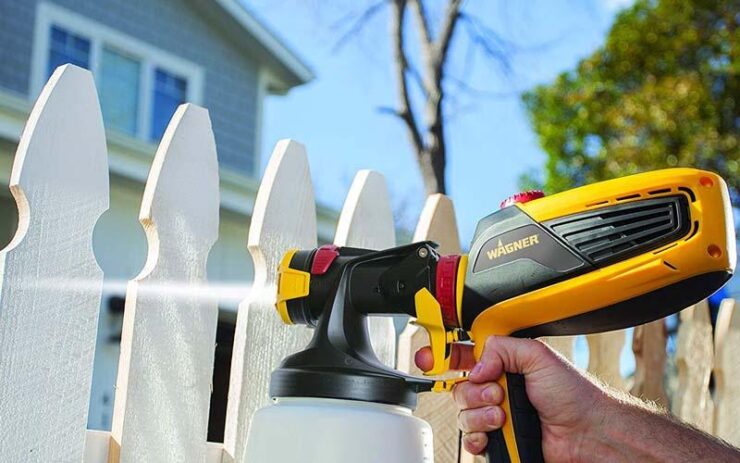
While quality paint makes the painting effective, one would need a proper sprayer. This would improve spraying efficiency and in effect, protection. A Wagner paint sprayer, for example, can accomplish this.
How, though, can one properly paint a fence with a sprayer? This article provides the guidelines.
How to Spray Paint a Fence
Preparation steps.
- First, remove all items or materials found near the fence. If bushes are grown close to the fence, use drop cloths to cover them. One can also use a rope to tie them away from the fence. Drop cloths can also protect the base of fences, driveway, lawn and patio stones.
- Second, repair or change any spoilt boards if your fence is old. Take a good look at your fence and search for any loose fittings. Endeavor to put on work gloves to cover hands. Then using a hammer fit all loose nails or use a screwdriver, to sink any screws. Also, smooth the surface of the wood to eliminate any splinters.
- Third, use a pressure pump to wash the fence. This will eliminate all dirt. Also protect yourself by wearing goggles, old clothes, and rubber gloves. Starting at one end of the fence, wash thoroughly to the other end. Allow the washed fence to dry for a day or more.
Application Steps
- Step 1
For protection, wear goggles, rubber gloves, old clothes, and a respirator. Then, look at the manufacturer’s instructions. Afterward, mix the paint completely by using a paint stirrer.
Turn the cover of the paint sprayer anticlockwise and remove the cover. Then, put the paint in the canister. Cover it and turn it anticlockwise. Press and turn the handle (up/down). This should continue until there is resistance. Resistance would make it difficult for the handle to depress. To lock the handle into the cover, turn it clockwise.
- Step 2
Stand at one end of the fence and start spraying from the top. Standing about 10 inches away from the fence, press the trigger. Then, spray the paint downward, doing this slowly and with gentle strokes. Repeat the process for the remaining boards. To maintain a normal spray pattern, turn the nozzle at its end. Also, repressurize the spray canister if the spray gets weak.
- Step 3
If there are any drips, brush it out with a paintbrush. One should do this after covering a 4-foot section. Also, use a paintbrush to paint the corners of the fence. Do the same thing for other parts of the fence until the fence is fully painted.
Depending on the type of paint used, the fence might need recoating. That is to say, applying a second coat. If that is the case, allow the first coat to dry before applying a second coat. This would take a minimum of a day. Next, repeat the same process to apply the second coat.
Conclusion
By carefully following the above guidelines, fences remain protected and preserved. This thereby protects privacies, while making it look attractive. Be sure to visit ToolzPick.com to get more information and other guidelines.