A motorcycle carburetor helps in mixing the right gasoline ratio and air required to run the engine well. A high gasoline ratio will lead to a rich mix while low gasoline will lean it out. The carburetor controls the throttle, idle speed screws and enrichner. Hence, you need to do time to time inspection to check if it is in proper condition. Motorcycles do not come at a cheap price, and so you should use the best motorcycle parts and accessories to maintain its performance and enhance its lifespan. It is also important to care about the bike parts and accessories and repair them immediately if needed. You can shop and select your Yamaha DT parts here.
Below here are some tips for proper caring of motorcycle carburetor.
1. Efficient care and Right Maintenance for Carburetor
You need to get general servicing done for the carburetor to work well. With time, the gasoline dries out leaving a sticky residue. This may hinder the pilot jet and ruin your trip. In order to avoid this mess, make sure you drain the float bowl after completing your ride and keep your bike at a stable location with fuel petcock switched off. If you do this, it will last more than a month. And, if your bike is not in function for a long time, then simply keep the carburetor detached from the bike.
When you wash your motorcycle, the water enters via the cable to the hot-start mechanism and damages the carburetor. Thus, you should make sure that the water doesn’t enter the carburetor or else, you will have to replace it. The carburetor is the central part of your bike, and hence it should be appropriately maintained.
Also, see: Daytona Bike Week 2019 Review
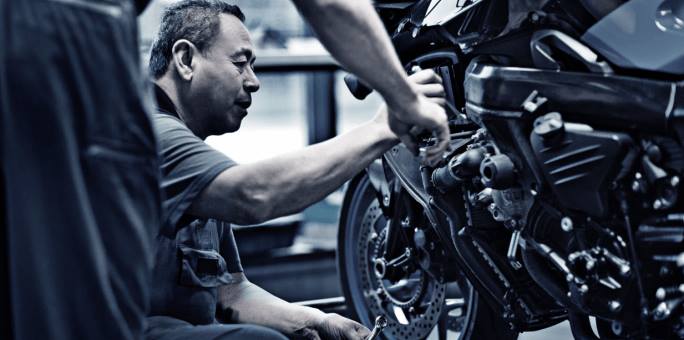
2. Removal and Reinstallation of the Carburettor
Remove the negative battery cable before going for the removal of the air filter. Make use of masking tape to pen the vacuum lines you have detached. Remove the choke links, throttle and other things connected to the carburetor. Ensure you have a mark on the removed items so that you remember them during re-installation. Also, remove the fuel line because there may be some fuel spill.
After all the links have been disconnected, remove the nuts covering the carburetor via a wrench. Pull out the carburetor from the engine cautiously and keep it at a level because it has fuel. Drain the fuel safely and remove the old gasket from the intake.
Clean the gasket with a cloth. Now install the new Mikuni carburetor and the gasket on the box. Safe it out with nuts and bolts and reinstall the links which have been removed before. Reconnect the choke, vacuum line as well as throttle and fuel line. Replace the air filter and connect the negative battery cable. This is how you replace and reinstall a carburetor.
3. Test the Engine
Switch on the engine and see if there is any fuel leakage. Do not pour gasoline on the carburetor to initiate the engine. Do cranking to allow the fuel pump to supply fuel to the carburetor. Do it for 30 to 40 seconds and then allow it to cool for 5 minutes before restarting.
Hope, you liked the tips. Please, comment below if these tips worked for you, or you need to contribute more content to the article.